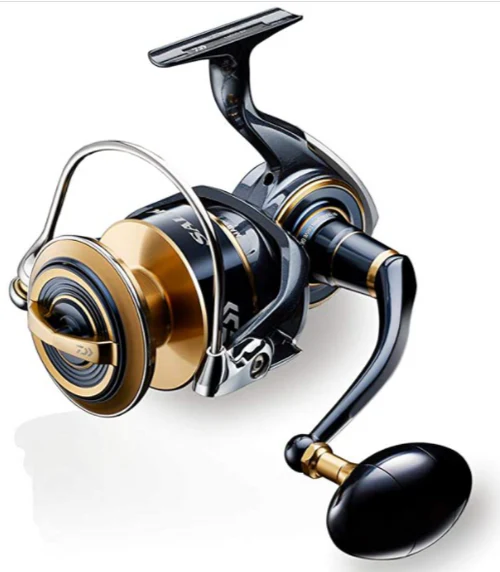
If you have one of the newer Daiwa Saltiga spinning reels, you have one of the best saltwater fishing reels ever developed.
The new 2022 Daiwa Saltiga has been updated substantially over previous models and features a “magsealed body” that protects internal bearings from saltwater intrusion, offering best in-class resistance to corrosion, as well as a “radiation” drag knob that more efficiently dissipates heat due to friction that will invariably manifest during epic fights.
That being the case, even though the new Saltiga is one of the most technologically advanced, and highest quality, saltwater reels ever developed, no saltwater reel will last more than a few seasons (at most) without routine, basic maintenance punctuated by a more thorough cleaning that necessitates partial disassembly.
Here’s how to keep your Daiwa Saltiga spinning.
After Every Trip
You don’t need to take off the rotor and sideplate of your Daiwa Saltiga after every trip, but you do need to render a routine cleaning nonetheless.
You won’t even need to take the reel apart. But here’s an important caveat - don’t hit the reel with a jet of water. That’s actually a myth.
If you do, you could be pushing saltwater or salt deposits further into the reel, where they can cause corrosion and seizing.
Rather than spraying your reel with a jet from the hose, give it a light mist, then wipe it down with a clean, dry microfiber rag. Repeat the process to ensure all external salt deposits have been dissolved and removed.
Besides, the new Saltiga is internally sealed anyway, so you don’t need to go crazy about removing those deposits. You just don’t want them there because one, they do cause corrosion, and two, if they get in your line they can abrade it.
After you’ve rinsed the thing off, you can oil the sensitive points. Place a drop of oil (either gun or reel oil, either works) on all moving external parts. This includes the reel knob, the line roller, and under the base of the rotor. You can and should also place a single drop of oil on all fasteners (screws) to prevent them from rusting.
If you’re feeling particularly sensitive, you can unscrew the crank arm and put a few drops of oil in the bearings on either side of the shaft, to ensure fluid operation and help forestall corrosion that can cause the reel to seize.
For a More Thorough Cleaning of Your Daiwa Saltiga
At least once per season, you should commit to a partial disassembly of your Daiwa Saltiga, so as to clean and grease the important internal components.
To do so, first, remove the crank arm, then unscrew the drag knob until you can pull the whole spool off the reel. Remove the retaining clip that secures the drag stack and pull out the washers and inspect these.
If they are clean, move on, if not, remove them and wipe them clean. Never apply oil or grease to the drag stack or washers, or to any part of the drag system, for that matter. Allow them to dry before reassembly. In the meantime, turn the spool over and remove any sand or debris that’s under the spool, especially where the main shaft runs through it.
Then, remove the bearings and screws at the top of the rotor, over the shaft. Remove these and place somewhere you will not lose them, in the order you removed them. They should be cleaned and oiled or greased.
Once you slide the rotor off the top of the reel body, you can remove the plate from the rear of the reel, then the side plate from the left side of the reel.
With the left side plate removed, you will be able to access the reel’s internals, including the main gears, which are made of high-quality stainless alloys.
These gears should be fairly clean since they are deep within the reel and are sealed off. However, grease breaks down over time, making it necessary to replenish it, as grease both lubricates the reel, allowing it to operate smoothly, while also sealing it off further against the influence of corrosion.
Use a reel grease for this application, not an oil, since grease is thicker and stays put whereas oil migrates and evaporates. Put a dab of grease on the teeth of each gear, but do not attempt to rotate them or work them with the reel disassembled.
Rather, from this point, reassemble the reel in the reverse order from which you took it apart, and once you have the reel put back together, crank the handle a few times to distribute the grease and oil you applied to the reel’s moving parts

Bookmark Our Blog for More Helpful Tips
While a Daiwa Saltiga can be disassembled even more thoroughly than described in this blog, this is a good starting point from which you can render effective routine maintenance and a relatively thorough deep cleaning of your reel in order to safeguard it and ensure it continues to operate as intended for many seasons.
While you’re here, bookmark our blog so you never miss our top tips - and make sure to take a look at our official YouTube channel, too.